Guide
From idea to film
How to work with the Studio step by step: start in the browser or the app, write the idea, check the animatic, fix a frame, mix the sound, edit, and hand it all to the agent.
Section 1
Getting started: browser or app
The Studio is the same in the browser and in the app. Only where the models run differs.
- In the browser: open the Studio and sign in with your xFormat account. Cloud models make the frames, video, voice and music.
- In the app for macOS or Windows: the same interface, plus local models on your device. The cloud is there too.
A project started in the browser carries on in the app.
Section 2
Your first film from Home
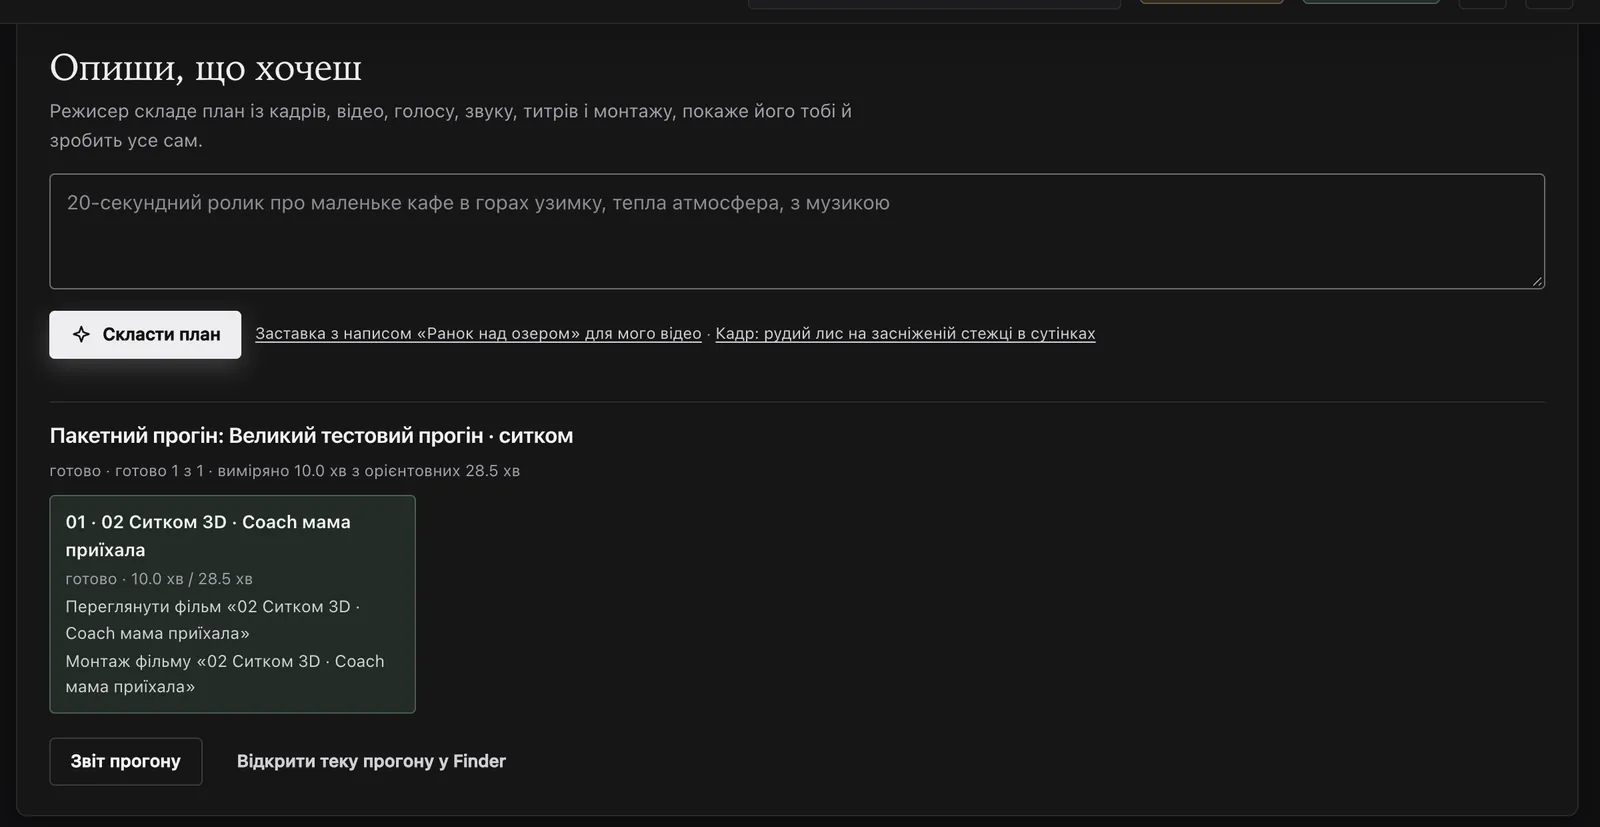
- On Home, write the idea in the “Describe what you want” field: what about, for whom, how many seconds, vertical or horizontal.
- Press “Make a plan”. The Director shows the scenes, characters, style, opener and music before generating anything.
- Change what you don't like and run it. Progress shows in the status bar, and every step lands in the gallery.
- The finished film opens in the edit and its scenes on the Script page, so anything can be fixed by hand.
Section 3
The path from idea to film
This is how the Studio's Director works, and how it pays to work by hand. Video takes longest, so it comes last.
- Format: 16:9 by default, 9:16 for Reels, Shorts and TikTok, 1:1 for a square post.
- Story: one question in the first three seconds, a turn at 65–85 % of the length, an ending told by an image. No more than three characters and four places.
- Plan: for each scene, what is seen, what moves, a line of up to 12 words, who speaks with what emotion, the place's ambience and event sounds.
- Plan check: the Studio finds a late turn, long lines, vague words like “a beautiful city”.
- Animatic: real frames and voices, every frame still. Minutes instead of hours.
- Review sheet: you look at every scene next to the character's reference.
- Video: the same plan; frames, voices and sounds already exist, only motion is made.
- Review and fixes: the smallest change that removes the weakest spot.
Section 4
Editing your own footage
The Studio doesn't only generate. Clips from your phone or camera can be edited, styled and prepared for any platform.
- Upload clips to the editing room, or select them in the gallery and press “Build an edit”.
- Cut, reorder, change speed. An editing style sets cuts, colour, push-in and subtitles in one click.
- “Subtitles from speech” recognises the words in the shot and lays them as titles.
- Add music: it ducks under the voice by itself.
- Make vertical, square and horizontal versions from one edit, and a cover for each.
- Make a 40-second Reels vlog from these five clips, with subtitles and light music.
- Remove pauses longer than half a second and add an opener with the city's name.
Section 5
The Studio's sections
The menu is grouped by action: showcase, create, assemble and system. On a phone it becomes a strip at the top.
Showcase
Home
Recent work, the queue and the Director's field. A film from an idea starts here.
Gallery
Everything made: search, filters, a large viewer. Select several files and build an edit from them. Deleted items stay in the bin for 30 days.
Create
Frames
A frame from a description, a photo edit in words, a character from a photo in a new scene. Variations and upscaling.
Video
Animate a frame or make video from text, keyframes, lip sync to a line, seamless extension.
Sound
Text to voice with emotion, voice to text, instrumental music, songs with lyrics, sounds and room ambience.
Motion
Animated titles, openers, end cards, covers, infographics and slideshows.
Batches
Several requests in one queue, each with its own settings.
Assemble
Script
A project by scenes: line, shot description, motion, frame, video and voice. Each scene can be redone on its own.
Characters and places
Clean character assets from every side and with emotions, empty places, props apart.
Workstation
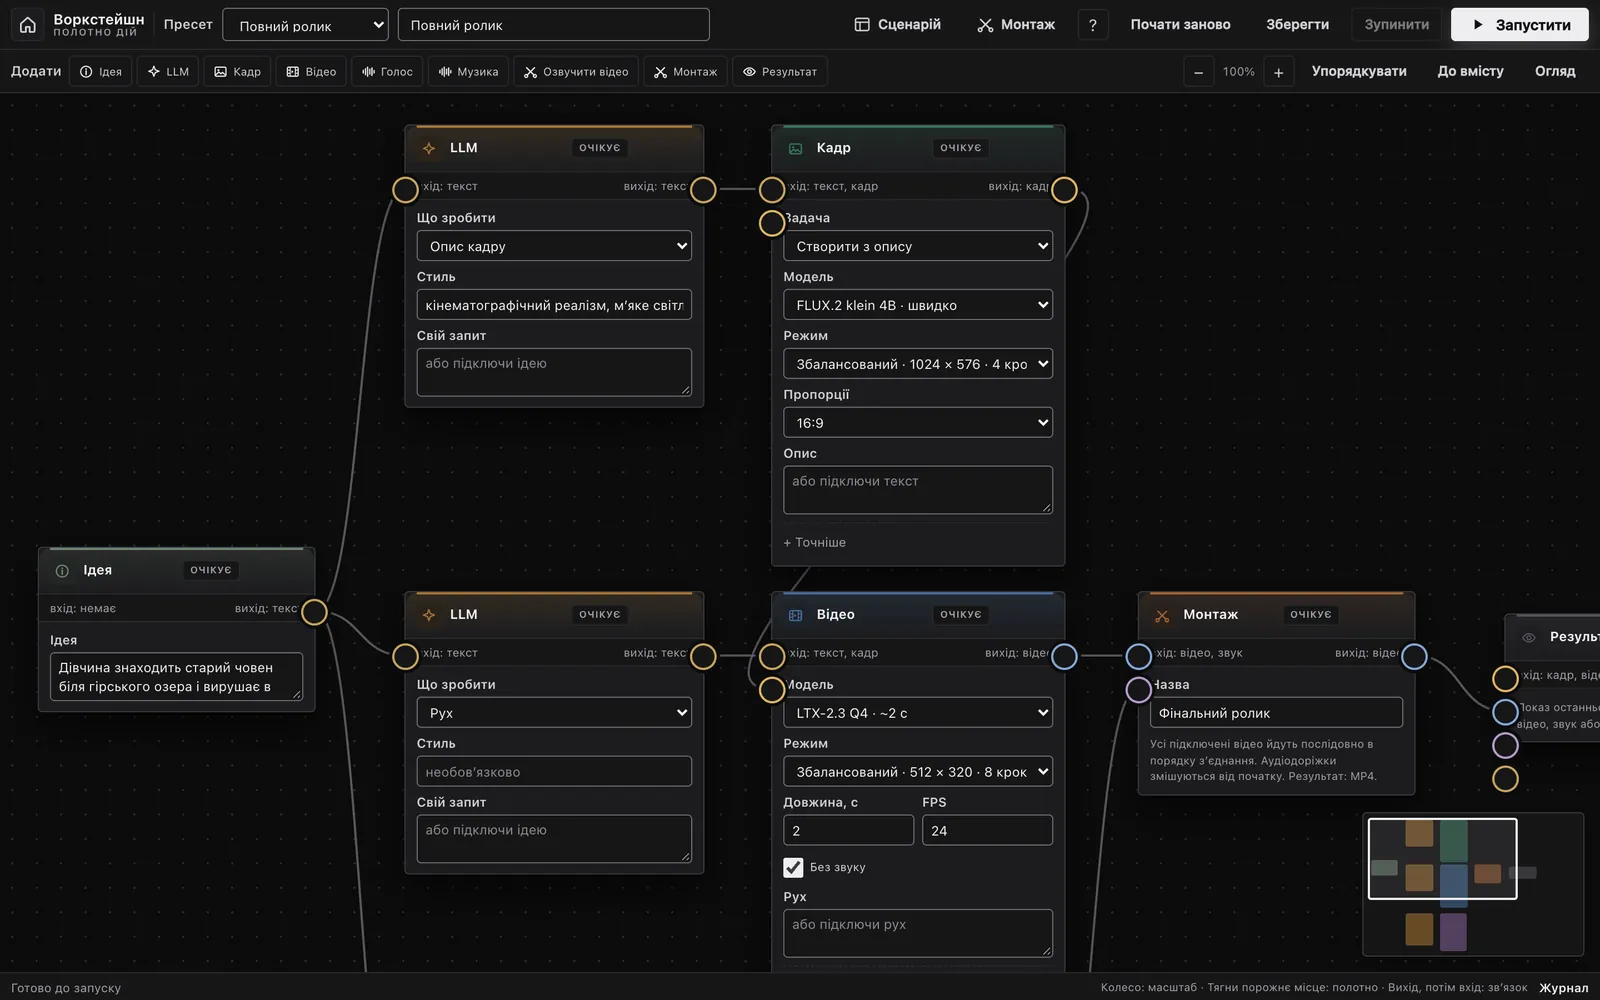
A canvas of actions: idea, frame, video, voice, music and edit nodes wired together.
Edit
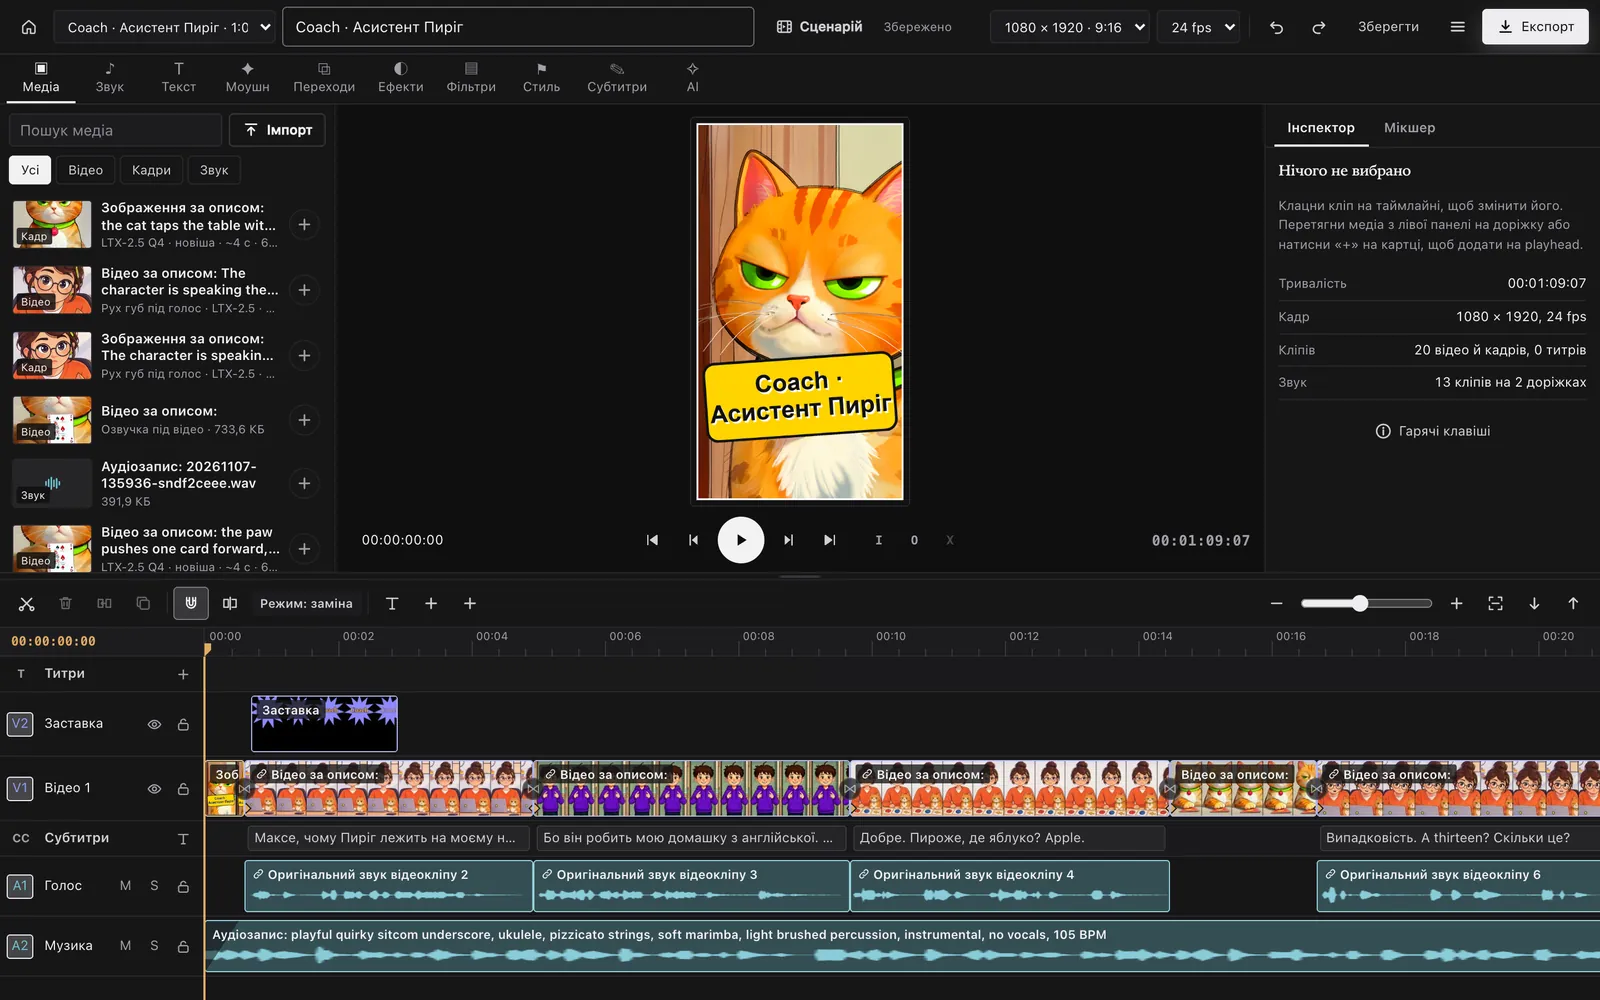
Media library, monitor, timeline, inspector and mixer.
System
Models
What is available in the cloud and installed locally, what each is good at and how long it really takes.
Settings
Theme, generation mode, cloud or local for each step, the agent plugin and disk space.
Section 6
Characters and places
Every frame drawn from a whole scene repeats its pose and drags its props along. So the Studio makes a character sheet, as in animation production.
- Original. Approve one drawing of each character (your photo or a frame you liked), and give it a fixed description and voice.
- Assets. Make views from the original: full length, face, three-quarter, profile, emotions, the back if needed.
- Review. Compare each asset with the original: same face, glasses, clothes, whole hands, nothing from the old scene.
- Places. Add empty places. A scene takes its place as the background, and a shot takes the character asset its angle needs.
Section 7
Animatic and review sheet
An animatic is the same film with every frame still: real frames, voices, ambience, effects, music, opener, subtitles and edit. It takes minutes, and this is where a mistake is cheap to catch.
- the same face as the reference: glasses, hair, clothes;
- every hand and every finger;
- no text on screens and signs, no stray phone or person;
- the line heard as written (the Studio flags a match below 80 %).
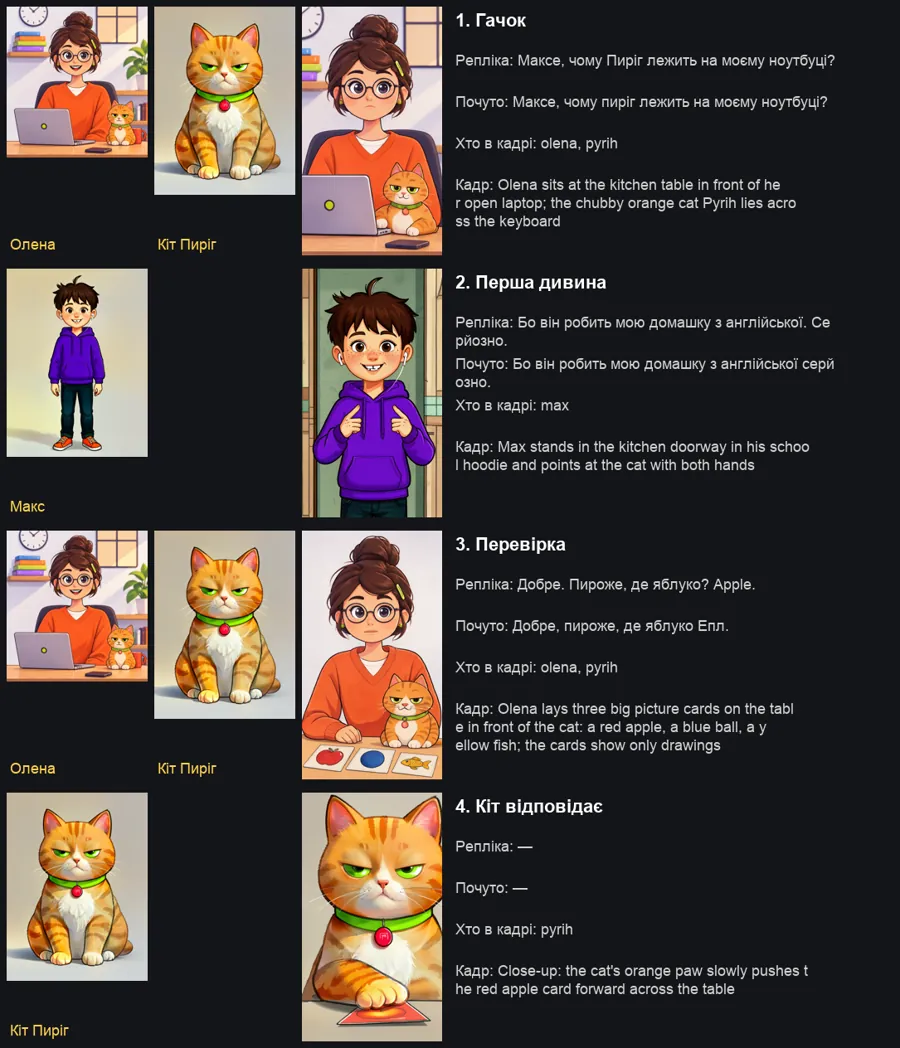
After the video, the Studio reviews the film itself: a contact sheet, loudness, dark and quiet spots, every line heard again.
Section 8
How to fix a frame
Write down the one weakest spot and why, then make the smallest change that removes it.
| What's wrong | What to do |
|---|---|
| A wrong detail in the frame | “Edit photo” on the Frames page: say in words what to replace or remove. The rest of the frame stays. |
| The whole shot is wrong | “Again” in the scene, or “Repeat with changes” with a better description. |
| Motion too fast or slow | Clip speed in the edit, no new render. |
| A sound is too loud | Track or group volume in the mixer, no new generation. |
| The edit doesn't fit the film | Another style in the edit's Style tab, no new renders. |
Cheapest first: a change in the edit before a new render, a new render before a new plan.
Section 9
Sound and mix
A film is mixed in four groups. Every sound is first levelled to its group's norm, then group levels and ducking go on top.
| Group | Norm | Under a line |
|---|---|---|
| Voice | −16 LUFS | the lead |
| Music | −16 LUFS | −12 dB |
| Place ambience | −36 LUFS | −6 dB |
| Effects | peak −12 dBFS | no ducking |
- Nothing louder than the line.
- Real recordings from the library first; a generated sound only where there is no recording.
- An event only for what is seen: a door when the door moves.
- One ambience per place; a quiet room tone indoors.
Section 10
The editing room
The Director's edit opens in the same editing room you work in. The agent's changes appear live, and every action can be undone.
- Clips move freely in time and between tracks; “Split” cuts a clip at the playhead.
- Up to 16 tracks, titles and subtitles on their own rows.
- Camera motion on a still frame: zoom in, zoom out, pan.
- A style in one click for all clips at once. Do it before fine edits.
- Speed from 0.25 to 4, reverse, freeze frame and speed ramps inside a clip.
- Export video with burned-in subtitles and a separate subtitle file.
Section 11
Openers, covers, styles
The Director picks the opener, end card, cover and editing style by the look of the picture, the film type and length. You can name any others; all of them are in the templates catalogue with examples.
- An opener is no longer than 8 % of the film. A short video does without a separate card: the title goes over the first shot.
- A series keeps one opener, one ending and one family of transitions.
- A cover: a template, a frame, 1–3 words and a face in focus; in vertical, the bottom fifth stays free for the platform's interface.
- One display font and one plain font per film, never three.
Section 12
Working with the agent
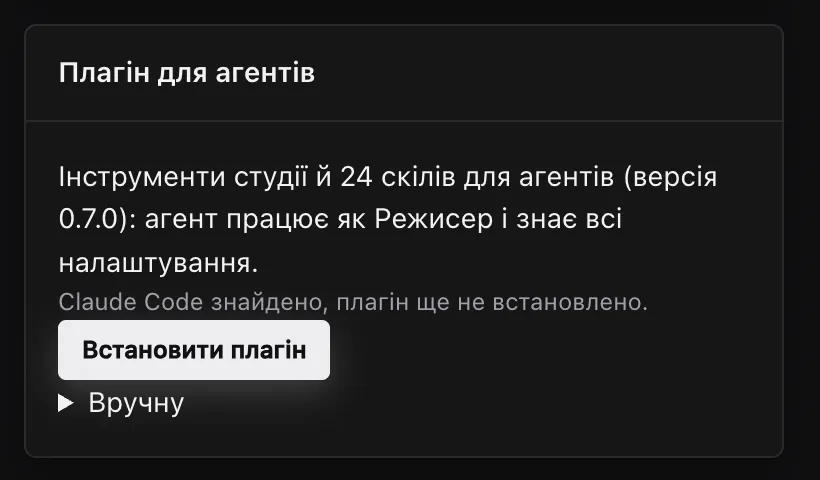
The Studio's plugin gives an AI agent a director's tools and skills. The agent writes the story, picks the characters, look, opener, sound and edit, makes an animatic, reviews it, and only then makes the video.
- Open Settings → “Agent plugin”.
- Press “Install plugin”.
- Restart the agent and talk to it like a director.
- Make a 45-second vertical sketch for Reels: Pyrih the cat does Max's English homework. Animatic first.
- Make episode two with the same characters and voices: mum arrives and wants to test Pyrih.
- Olena's glasses vanished in scene 3. Fix only that frame and rebuild the animatic.
- Make a YouTube cover and a vertical one for Shorts: Max's face and two words.
- Make a one-minute kids' tale as a watercolour book, with no villain.
What the agent did shows on the Script and Edit pages: every scene can be redone by hand.
Section 13
Local models and the install wizard
Local generation is a choice, not a requirement. It is faster without queues, works offline and gives you models for the task.
- Download the app for macOS or Windows and run the wizard.
- Choose what you need: frames, video, voice, sounds and music.
- The wizard checks the device, picks models that will run on it and installs everything itself.
- In Settings, choose for each step: local or cloud.
Section 14
Pitfalls and how to avoid them
Every row here is a mistake a person saw in a real film.
| What you see | Why | Do instead |
|---|---|---|
| Broken fingers, extra hands | Models break small hand actions in close-ups | Hands at rest or out of frame; the object lies, not held |
| The character became someone else | They took off what makes them recognisable | Glasses, hair clip, cap stay in every frame |
| “No X” written, and X is there | Models ignore negations | Describe what you want to see: “an empty street”, “a clean label” |
| Made-up letters and logos | Models cover screens with invented text | Keep screens blank; words go on as Motion titles |
| Smeared lips | The face is too small | Medium close-up; split a line longer than 5 s into two shots |
| Unclear words | A long line, numbers as digits | Up to 12 words, numbers as words |
Ready for your first film?
Open the Studio in the browser or install the app. The guide takes you from the idea to the finished video.